Posts

Showing posts from May, 2020

Block plate bolts, transmission connections, starter, creeper modification

Image
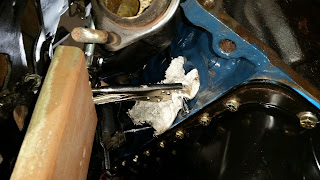
So I was missing the 2 block plate to bellhousing bolts. I recognized the size as being the same roughly as the 4 larger oil pan bolts. So I ran a tap through the hole because it's not threaded all the way through.  I installed the speed sensor. The clip wouldn't sit right no matter which way I tried. I will have to go back to it another time.  Connected the wires and since they are no longer in a split loom I ziptied them to the hold down locations.  I installed the clutch cable and pried the clutch fork forward and inserted the cable end. I installed the dust cover.  I installed the starter. Back to the creeper up grade. I cut some cheap 1 inch box and extended the inner bar about 1 inch and added a 4 inch long section on the outside.  Need to get the hardware before I drill the holes. In the meantime I will just use cardboard.

Cooling system install

Image
I installed the cooling system yesterday. The upper rubber isolators were trashed so I asked my wife, what can you think of thats flat and rubber. She says how about old shoes. So I grabbed an old set of kids water shoes and some shears and just trimmed until they stuck into the brackets. I may paint them but for now it will work. I'll probably pick up all my fluids at once coolant, transmission, power steering. I still need a new fan. I am undecided on 2x 12 inch fans or replace the Taurus fan internals. The shroud is pretty nice but the draw is insane. I might just rewire it and give it a try with a new battery before I give up on it. I have a problem with my creeper it basically kicked all the bearings out of the casters. I have 4 nicer casters around the same size but the mounting points are 2x3 inches. So i am welding additions to the frame.

Transmission fun

Image
So the cribbing idea to floor jack idea was a fail. It was really the sled. I lifted it and the angle was just off. I couldn't access the bolt to lock it to the jack. So i pulled it off the sled onto my chest and just didn't have enough power to lift it. On the dismount I dislodged the tail shaft plug and half the fluid ended up in my glove.   I regrouped and made a tiny little holder made of wood and bolted it to my jack that had a better angle. I drained the fluid at least what a 45 degree tilt would allow. I'll probably try the drain plug at another date. I balanced it in the holder and ratchet strapped it to the jack. Then wiggled and slid it under the car.  A little closer and up  Only inches.  Jut the pilot bearing to go.  It took some wiggling and up and down and a jab to clock it, but it finally seated. I threaded 1 bolt finger tight and wiggled a little more until it seated all the way.

Flywheel, clutch, bell housing and some other details

Image
Installed the new flywheel.  Installed the new clutch.  Installed the clutch fork and throw out bearing  And then the bell housing  Installed a new transmission tailshaft seal.  I built a sled to drag it into place under the car and there's a bolt that fits the center of my jack through the center board. I may have to pull the shift cause there's exactly 19 inches under the pinch weld and thats the same to the shifter nub.

New flywheel, oil pressure gauge install

Image
The new flywheel came in only 4 days and it matches the original.  I decided to install the oil pressure gauge line through the cruise control grommet. It used to be with the main wire harrness but I had that space open and it gave my the opportunity to hide it better.  I wrapped it in washer hose where it's against the frame rail  I tucked it into the main wire tuck.

Pressure testing the heater core, main wire harness and power steering g

Image
So I did a rough pressure test of the heater core. Just holding my finger over the other side and the balloon doesn’t get smaller. It's not fool proof because it will see 16 to 18 psi.  I installed the main harness and re wrapped the a/c harness and ran it to the fender to connect it. I cleaned out the power steering lines and added a new filter as the new steering rack recommends. The clamps I had of course were too big so I broke down and went to autozone. While I got the clamps I couldn't resist buying the bolt I ordered on amazon cause I don't want to wait. The rack may still leak because I am not confident in how tight I was able to get the lines. If it leaks I will have to pull the rack forward to tighten the fittings. With the new bolts I finished the accessory install.

Engine accessories install

Image
I installed the power steering pump braket and a/c braket and a/c compressor. I do not like the ugly brown bracket but after 3 times scrubbing with purple degreaser and a wire brush and 1 power washer session, thats where it was. After its running I'll hit it with a flap disc and paint it. I think I'll probably paint all the accessory brackets grey together to match the water pump or if i can get it to a natural metal finish I will clear them.  I was not as lucky on the alternator bracket where only 1 of the 3 bolts actually was correct. I ordered some 3/8-16 1.75" bolts for the bracket and some  3/8-16 nuts for the top alternator bracket which was some random undersized hex bolt and nut. Now because of corona virus, I get to wait a week for bolts and nuts I could pick up at the store.  Interesting note the engine is balanced on the motor mounts without the alternator installed so it can be tilted easily to install the transmission. I am curious will the fly wh

Plugs and wires, getting organised

Image
Earlier in the day I cleaned the power steering pump and gave the pulley a light spray.  I wire wheeled the braket just to get some of the dark oily residue back to cast gray.  I installed new plugs and wires. The old plugs were oil and gas fouled and just nasty. Also they were gapped too tight at .04. The new plugs are just bare bones copper autolites at a .054 stock gap. The wires well the new ones aren't burnt like the old ones. Honestly I think I might have to do valve guide seals but we will see after we run it. I dug out the accessories and located the brackets and hardware. Need to clean the power steering lines and add a filter at the cooler. I also cleaned the transmission mount and the clutch fork. I need to wait for the new flywheel and the top transmission bolts but I can do lots of other things to get ready. I am kinda working in 4 different areas transmission, wiring, engine and accessories and brakes. So I am staring grouping of parts. 

Headers, dipstick fight and cleaning the back of the motor.

Image
So I started today installing the headers and the dipstick. I knew it was going to be a pain from what I read. I really didn't want to loosen a motor mount and lift the motor, because I just torqued it down. So I put a vice grip around the dipstick at the top rib after it was started and knocked it in with a long screw driver. It took 5 or 6 times to get it to start and It gouged the chrome but it went in up to the bead of rtv I put on the tube. I used a board to stop the vice grips from drooping. Then I used some rtv to cover the gouges so it won't rust.  I had to take the clutch cable off the frame to have enough room to slip the header in. I used some zips ties to hold the gasket on until the bolts were started and then cut and removed them.  After the battle with the dipstick the passenger side was super easy.  I clean the back of the motor and put the block plate up as I cleaned out the bolt holes. I was missing 1 of the upper shorter bolts so I ordered 2 from HD

The punch list

I might as well put up the punch list. Clean back of motor Check bellhousing bolt holes Install block plate Check pilot bearing grease Install flywheel with red locktight (ordered a new one because of hot spots and ridges) Install clutch and pressure plate Install bellhousing on transmission Install clutch fork and throwout bearing Change tail shaft seal Install transmission Install crossmember and mount Install Oil pressure gauge Install starter Install wiring,  Install grounds Install headers and dipstick Install drive shaft Install h-pipe Install engine accessories Install new serpentine belt Install radiator Install hoses Install fan Install new battery Flush fuel system and install fuel lines Install upper intake and maf sensor Check sticky throttle body, install Clean and install Rear swaybar  Rebuild passenger caliper Install new rotors and pads, bleed brakes Install crash bar fog light bar Install fenders  Install shifter and fill transmission Ins

Motor back in its home

Image
I couldn't resist putting it back in. Took about 2 hours but I also painted the underside of the he k-member. Well only a little sketchy, I needed to lengthen the front chain to clear the distribtor so I used a dog choker chain. I shortened the hook on the crane so the motor wanted to turn 90 degrees the whole time. I didn't want to lower the car because wheels are off so I needed that 2 inches to clear the ceiling.   The nubs on the passenger side motor mount didn't want to seat so a little twist and up and down 5 times and it dropped in. For now I just have a piece of wood wrapped in fabric propping the motor against the firewall. Tomorrow I'll scrub the back of the motor and throw on the block plate and fly wheel. If I do 2 or 3 things a night it could be done in a week. The punch list is still long.

Fuel system, balancer and crank pulley

Image
I started the day cleaning the fuel injection ports. Q-tips and throttle body cleaner got them pretty clean. At least there's no crud.  There was some corrosion on number 2 port but nothing I can do about it with the intake installed.  I installed the o-rings and pintle caps before lubing up the o-rings and seating them in the fuel rail.  I cleaned the pitting with a brass brush and wiped the fuel rail and cleaned the ports.  Dropped all the injectors in.  They took a good bit of wiggles to get it seated and then some pressure while bolting it down.  I wire wheel the balancer and wiped it down with wax. Put some anti seize on the lip of the crank pulley where they like to stick.