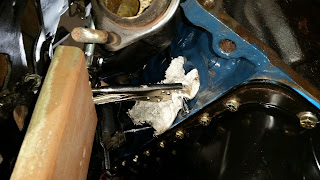
Headers, dipstick fight and cleaning the back of the motor.
So I started today installing the headers and the dipstick. I knew it was going to be a pain from what I read. I really didn't want to loosen a motor mount and lift the motor, because I just torqued it down. So I put a vice grip around the dipstick at the top rib after it was started and knocked it in with a long screw driver. It took 5 or 6 times to get it to start and It gouged the chrome but it went in up to the bead of rtv I put on the tube. I used a board to stop the vice grips from drooping. Then I used some rtv to cover the gouges so it won't rust.
I had to take the clutch cable off the frame to have enough room to slip the header in. I used some zips ties to hold the gasket on until the bolts were started and then cut and removed them.After the battle with the dipstick the passenger side was super easy.
I clean the back of the motor and put the block plate up as I cleaned out the bolt holes. I was missing 1 of the upper shorter bolts so I ordered 2 from HD with washers shipped for $10. I know box store hardware is not oe but it's better to have then not. I have watched a few people test the tensile strength of bolts and it's good enough in my opinion.
I took some time and cleaned the old fly wheel and check the sizes. The old flywheel has some crystalized hot spots and ridges so I ordered a new one to match my luk clutch set, $57 shipped amazon.


