Posts

Summer time car shows

Image
Ahh summer time and my favorite activity, going to car shows. My first car show of 2023 was Bald Hill in Farmingville May 7th. Bald Hill is nice because the lot is shaded by solar panels. I went primarily for the Swap meet but my older son wanted to bring the car. I am always on the look out for used tools, go-cart parts and car parts. The only excitement was on the way home it decided to spit out the clutch fork cover on the highway. I knew what it was, seeing it tumble down the shoulder in my mirror.    More recently I heard on the local news about a car show at the Bellmore Train Station Friday nights. I have known about it for years and decided to offer the kids a chance to go. We came a little late and it was packed with people and cars. More rowdy with the occasional burnout and fly-bys on the main strip outside the show. Definitely going to try to go again and invite some friends. My kids enjoyed waving to people in hot rods. Gotta teach them the throttle twist ;) ...

molding fix

Image
Finally decided to fix the passenger side molding that has gotten detached and been hitting the fender. I peeled it a little and start cutting the adhesive with a flat razor top and bottom.  Whatever adhesive I could peel with my fingers I took off. A little acetone and a micro fiber rag took the rest of with a little help from a finger nail here and there. I used a nylon bristled wheel on a drill to clean the adhesive off from the molding. after wiping it down with acetone, i applied two 1 inch 3m brand molding strips the length of the molding. I put 3 strips of masking tape on the front face of the molding and taped it to the side of the car a little low and peeled the tape gradually moving it up from side to side until I was happy. I flipped it up and started to peel the top adhesive strip. I probably should have started both because it was hard to start the bottom after the top was adhered.

low profile sub

Image
I Installed one of my Christmas gifts. I had run an amp on signal wire and RCA's and stashed them inside one of the dash speaker grills.  I forgot I crimped an unstripped wire for amp on signal to protect it from shorting. So when I added the next length to the crimp into the trunk I had no conductivity. I went back and tinned the end of 4g wires for the terminal ports because the stranded wires left gaps when it flexed. 4g wires didn't want to fit but after tinning I use a metal file. I also added some duct seal under the broken plastic cover for the main battery breaker on the side of the battery box.

shift handle experiments

Image
I had an old wrench I had cut the end off for a past project and decided to make a shift lever adapter for my bakolite 33  Ford knob. Think I need to turn it 45° more. If I drop 2 washers into the receiver it should be right but I ran out of time today. I also have a black ball shift knob and the silver skull which I bought some threaded hardware to make them more sturdy and extend the lever. I swapped the Allen key for slotted set screws. I also want to mess around with the angle cause I currently have to reach for 1st.   I am a fan of early hurst bent style levers and the 70s Mopar pistol grip as well. The shifter I have currently is a gen1 t5 Hurst shifter but it still has the plastic ball cup. There might be a brass one but for now it's not important. Another cheesy idea I had was going to pick up a cheap survival knife at a swap meet, drill some holes in the blade and try that, still with the Paracord wrap on a metal handle. Don't know if I could get the angle right and I...

water pump redo

Image
So with the change in temperature at the beginning of the year the water pump started sleeping when it was cold. This gradually got worse through the heat cycles. With corrosion evident on the bottom of the pump I decided to redo the water pump even though I am sure it could have just been resealed and been ok. I think I made 3 mistakes last time. I used the crap black gaskets that came with the pump. I used ultra grey rtv. I sealed the inner air pockets inside the pump. These filled with fluid and with the thermal expansion compromised the gasket. I went for a motorcraft pump this time as well as the light blue permatex rtv 22071. After I heatcycle the motor a few times I am going to go back and torque everything again. I also replaced the 2 left bolts that had corrosion on the from last time, with stainless ones. (5/16 - 18 4") I would have liked a 3 7/8" bolt but it's not available in stainless locally. I put a cut in an old bolt and chased the ...

power steering rack line seals

Image
I finally decided to stop the leak that leaves a ton of fluid on my garage floor. I ordered the maximum motorsports rack seal kit. The instructions say you need to be clean before applying the sealant to the threads. I drained the rack and purged the rack after the lines were off so I could get rid of that little bit of fluid in the ports. i decided to completely remove and flush the lines to install the nylon seals. And have them stay clean through the install. the old one was chewed and the one that looks like new, wasn't installed right. Used the 2 screw driver method to gently stretch the rings out.  Then of course I take a break and get COVID. So 2 days later I am posting the pics.

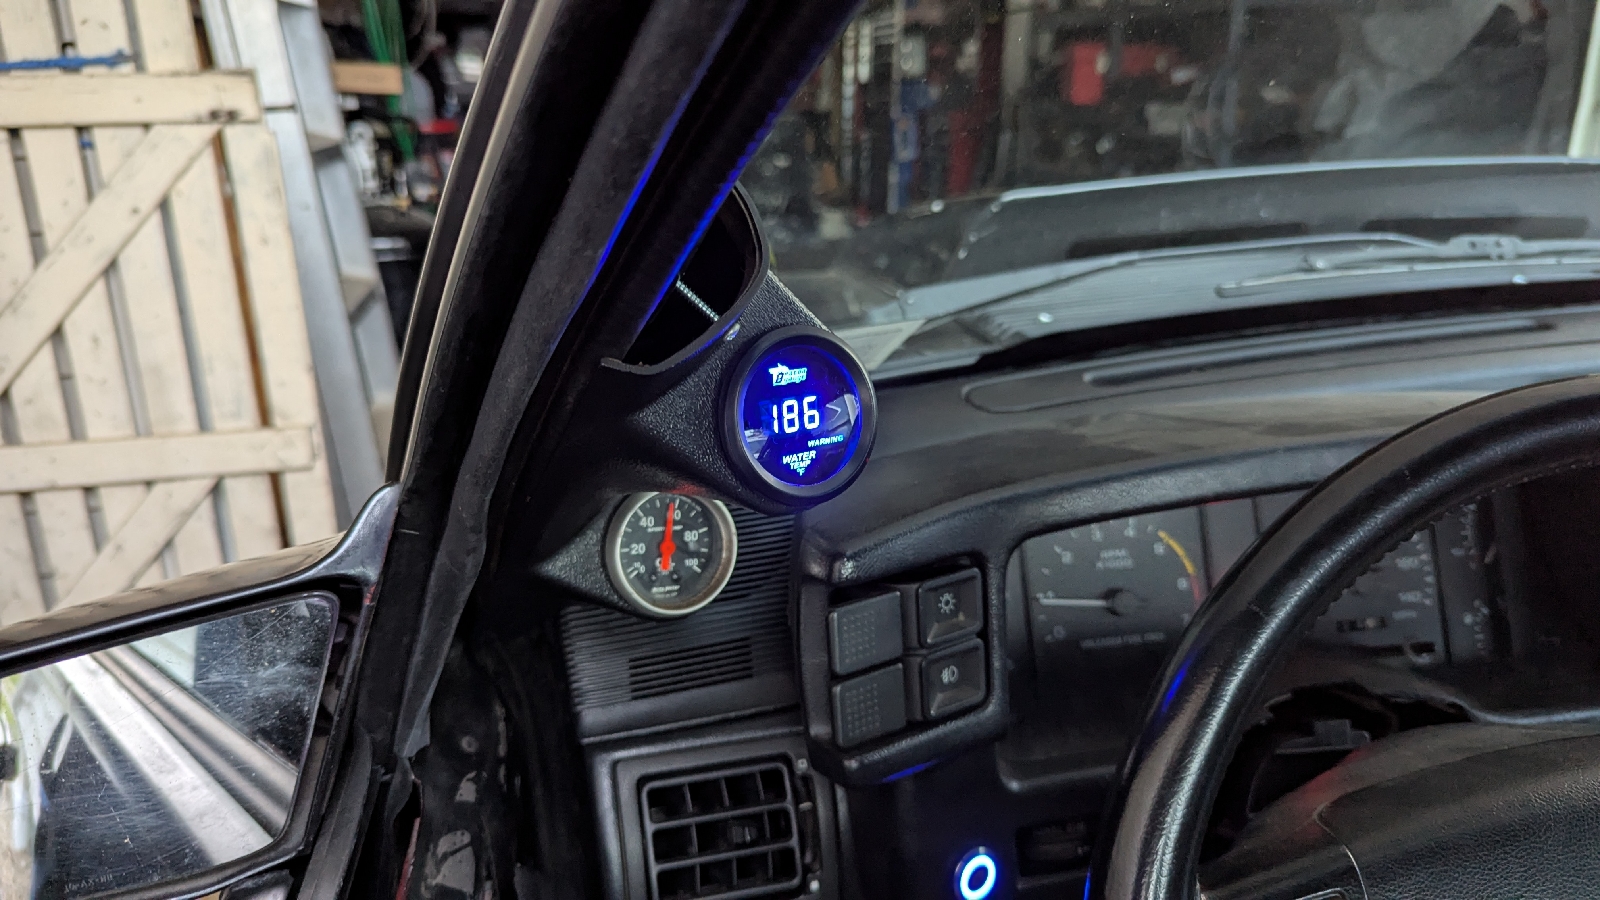
new thermostat housing and temp gauge

So I decided I needed a better water temp gauge on the fox. After looking at prices options and new sensor locations, I decided on a super cheap digital gauge and a new thermostat housing with a 3/8 port. The first gauge I received was in Celsius which I returned and ordered a 3/8 to 1/8 npt adapter. I found an AutoZone thermostat housing combo with a gasket.  There was a good amount of casting slag in the turn of the water neck which I took a file to.  I didn't notice the waterpump bypass nipple was an inch longer than one making getting the tiny right angle bypass hose on and real pain. I ended up folding it in half and ziptieing it, to get it started on both nipples at the same time. I found some corrosion on the threads of the bolts when I took it apart so I coated those in liquid ptfe sealant as well as the sensor and adapter. For a gauge mount I am just using some scrap plastic and a 2" hole saw to make a temp mount. I'd like to make a dash pod that sits where the ol...